How to Easily Track Time with a Billable Hours Chart
Learn how to track billable hours with a billable hours chart. Boost profitability with our step-by-step guide to accurate time management and revenue insights.
Time is the backbone of every business. Every hour you work directly impacts your revenue, but only if you track it accurately. A billable hours chart transforms raw time data into clear insights, helping you boost profitability and streamline operations. Without proper tracking, unrecorded hours can quietly reduce your earnings, leaving you underpaid for your work. By using a billable hours chart, you gain clarity, consistency, and control over your time management. This article guides you through creating and using one effectively, so you can transform time into revenue with confidence.
What Is a Billable Hours Chart?
A billable hours chart is a structured tool for recording, analyzing, and visualizing time spent on client work. Its purpose is to separate billable hours from non-billable hours, ensuring you capture every payable moment. Common formats include spreadsheets like Excel or Google Sheets, dashboards in time-tracking software, or integrated reports in project management tools.
Key components of a billable hours chart include:
- Date: When the work was performed
- Client or Project Name: Links tasks to specific revenue sources
- Task Description: Brief context of the work, such as "Website mockup"
- Start and End Time: Tracks duration for transparency
- Total Hours: Calculated automatically
- Billable Flag (Yes or No): Marks whether the time is chargeable
- Hourly Rate: Varies by client or project
- Amount Earned: Hours multiplied by rate
Visualization is essential. A well-designed billable hours chart highlights profitability patterns, making it easier to spot inefficiencies or opportunities for growth.
Why Use a Billable Hours Chart Instead of Just Time Logs?
Basic timelogs lack the structure needed to optimize revenue. A billable hours chart offers distinct advantages:
- Accuracy: Clearly separates billable and non-billable work, reducing invoicing errors. This precision ensures you bill clients only for chargeable hours, avoiding disputes.
- Accountability: Provides transparent data for clients and team managers, building trust. Clear records demonstrate professionalism and justify your invoices.
- Efficiency: Delivers quick insights for adjusting rates or reallocating time. Visual summaries save hours of manual analysis, letting you focus on high-value work.
- Forecasting: Uses historical data to predict future workload and revenue. This helps you plan resources and set realistic project timelines.
Unlike simple logs, a billable hours chart connects time tracking to business strategy, helping you make informed decisions about pricing, staffing, or client priorities. It turns scattered data into a clear roadmap for growth.
How to Track Time Using a Billable Hours Chart (Step-by-Step)

Tracking time accurately goes beyond noting tasks. It involves understanding how your hours translate into value. A billable hours chart makes this process a daily habit. Here’s a step-by-step guide to set one up and use it effectively.
Step 1: Choose Your Tracking Method
![]()
Select a method that fits your workflow, balancing control and automation.
- Manual Tracking Spreadsheets are ideal for freelancers or small teams, offering full customization. You can add columns, formulas, or color codes to match your billing structure. Best for: Those with few clients or simple projects.
- Dedicated Time Tracking Tools These tools provide start and stop timers, task categorization, and automatic billable hours calculations. They reduce manual entry while maintaining accuracy. Best for: Professionals seeking precision without constant logging.
- Project Management Tools Platforms like TaskFord combine task tracking, team capacity, and billable hours reporting in one system, offering a complete view of productivity and profitability. Best for: Agencies or managers overseeing multiple team members and clients. Teams of all sizes.
Pro Tip: If you’re new to tracking billable hours, start with a simple spreadsheet. You can upgrade to a billable hours tracker or project management software as your needs grow, ensuring scalability without complexity.
Step 2: Set Up the Core Columns
Your billable hours chart should instantly show what you worked on, for whom, and its value. Use these core columns:
| Column Name | Purpose |
|---|---|
| Date | Records when the work occurred. This helps align tasks with project schedules and deadlines. |
| Client or Project Name | Ties tasks to specific clients or projects. This ensures accurate billing and easy client reporting. |
| Task Description | Clarifies the work, such as "SEO audit for blog." A concise description provides context for you and your clients. |
| Start and End Time | Ensures transparency for hourly billing. Precise times build trust and support detailed invoices. |
| Total Hours | Auto-calculated (End minus Start). Automation reduces errors and saves time during invoicing. |
| Billable? (Yes or No) | Flags whether the time is chargeable. This distinction helps you focus on revenue-generating tasks. |
| Hourly Rate | Sets client- or project-specific rates. Custom rates reflect the value of different services or clients. |
| Amount Earned | Formula: Hours multiplied by Rate. This shows the financial value of your time for each task. |
Pro Tip: Use conditional formatting to highlight non-billable hours in red. Visual cues help you identify time leaks at a glance, making it easier to optimize your workflow.
Step 3: Define Your Billing Rules Clearly
Clear billing rules ensure consistency and fairness. Write down your billable policy, even if you work alone. Share it with your team if you manage one to maintain alignment.
Billable Time Includes:
- Deliverable-focused tasks, such as coding, writing, or design. These are the core services clients pay for directly.
- Client meetings and presentations. Time spent directly engaging with clients adds value to their projects.
- Approved revisions or edits. These are part of agreed-upon deliverables and should be billable.
Non-Billable Time Includes:
- Internal planning or training. These activities support your business but don’t directly generate revenue.
- Administrative tasks, such as emails or scheduling. These are essential but typically not chargeable to clients.
- Extra revisions outside contract scope. These should be tracked separately to avoid underbilling.
For retainer clients, track non-billable support separately to showcase added value during contract renewals. This transparency can justify rate increases or extended contracts.
Pro Tip: Create a one-page billing policy document to align your team and avoid underbilling. A clear policy reduces confusion and ensures consistent reporting.
Step 4: Log Time Daily, Review Weekly
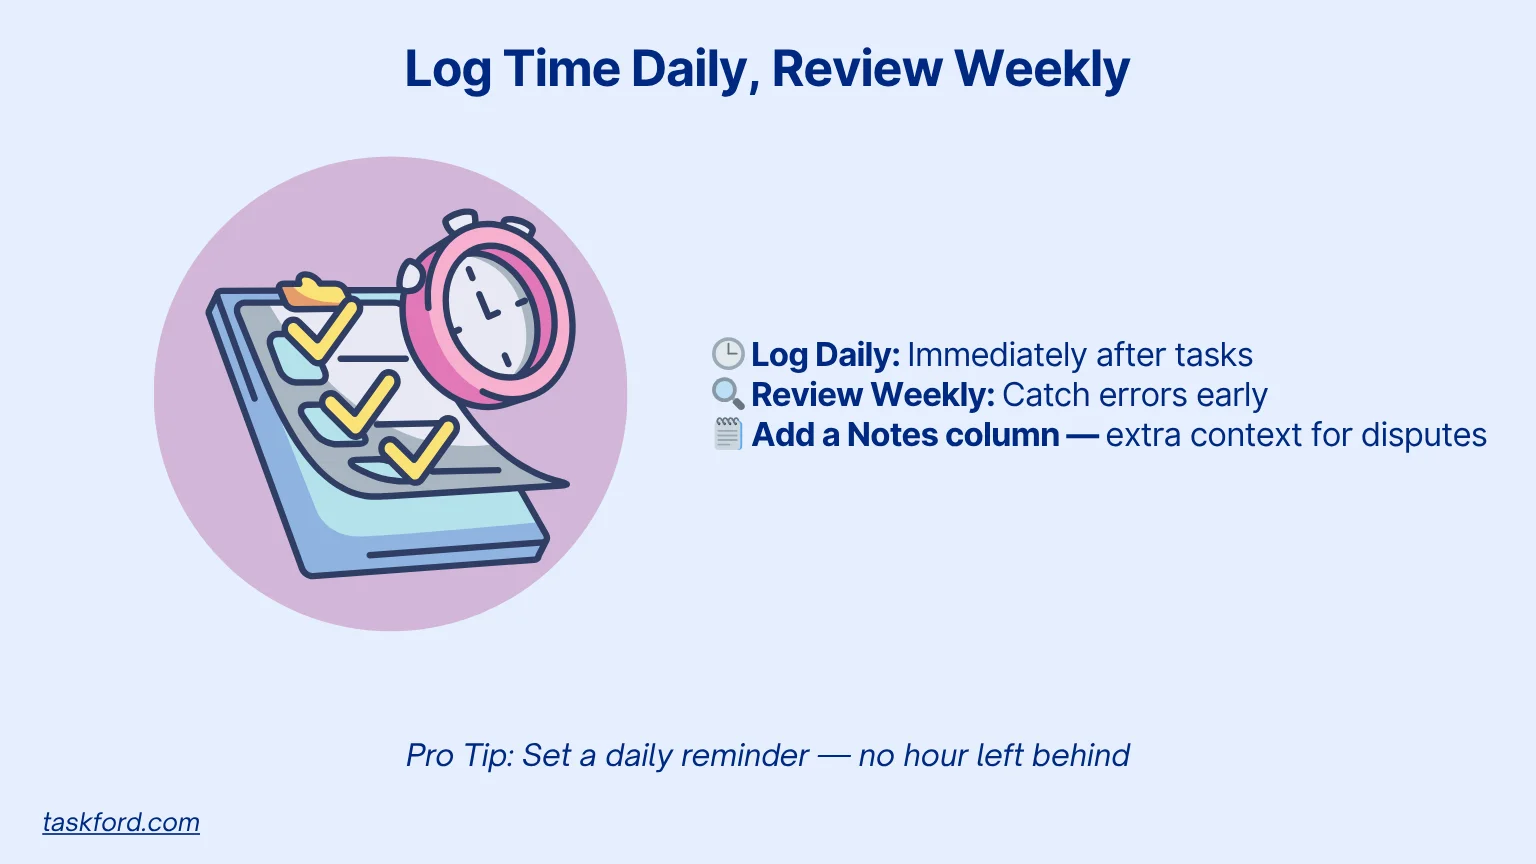
Forgetting to log hours can cost you 5 to 10 percent of your billable time. Build a routine to prevent this.
- Log Daily: Record hours immediately after each task. Delaying even a few hours leads to inaccurate estimates and missed revenue.
- Review Weekly: Check for missing entries, incorrect billable flags, and alignment with project timelines. Weekly reviews help you catch errors early and maintain accurate records.
Add a “Notes” column for context, such as "Client requested extra call." This simplifies billing disputes and provides clarity during client reviews.
Pro Tip: Set a daily reminder on your phone or calendar to log time before wrapping up work. Consistent habits ensure no hours slip through the cracks.
Step 5: Visualize and Analyze Your Time Data
After a few weeks, your billable hours chart becomes a source of valuable insights. Use visualizations to uncover trends and make data-driven decisions.
- Billable vs. Non-Billable Ratio: Shows how much of your time generates revenue. A low ratio may indicate too much time spent on admin tasks. This metric aligns with the concept of utilization rate, which measures the percentage of total hours that are billable, providing a key indicator of team efficiency and profitability.
- Hours by Client or Project: Identifies which clients demand the most time or yield the least profit. This helps you prioritize high-value clients.
- Earnings by Week or Month: Tracks income trends and informs workload planning. Consistent tracking reveals seasonal patterns or growth opportunities.
For freelancers, review these charts monthly to adjust pricing or focus on high-value clients. For managers, share them with your team to optimize capacity and profitability.
Pro Tip: Use a pivot table in spreadsheets or built-in dashboards to create these visuals quickly. Automation saves time and enhances clarity.
Billable Hours Chart Example
Below is a sample billable hours chart for one week, using fictional data:
| Date | Client or Project | Task Description | Start Time | End Time | Total Hours | Billable? | Hourly Rate | Amount Earned | Notes |
|---|---|---|---|---|---|---|---|---|---|
| 10/06/2025 | Company X | Website mockup | 9:00 AM | 11:30 AM | 2.5 | Yes | $75 | $187.50 | Client feedback included |
| 10/06/2025 | Internal | Team training session | 1:00 PM | 2:00 PM | 1.0 | No | $0 | $0.00 | Mandatory training |
| 10/07/2025 | Company Y | SEO audit | 10:00 AM | 12:00 PM | 2.0 | Yes | $60 | $120.00 | Extra revision requested |
This sample billable hours chart tracks a week (October 6-7, 2025) with three tasks: a 2.5-hour billable website mockup for company X ($187.50), a 1-hour non-billable internal training session ($0), and a 2-hour billable SEO audit for company Y ($120). Notes capture client feedback and revisions. Using a billable hours chart like this clarifies time allocation, enabling smarter pricing and resource planning to boost profitability.
Advanced Tips When Using a Billable Hours Chart
Elevate your billable hours chart with these strategies:
- Automate Reminders: Set calendar alerts or use apps with built-in notifications to prompt daily logging. This reduces the risk of forgetting to track billable hours.
- Use Tags: Categorize tasks by service type, such as “consulting” or “design,” or by client for deeper analysis. Tags make it easier to filter data and spot trends.
- Integrate with Invoicing: Sync your billable hours tracker with spreadsheets to streamline billing. Integration reduces manual errors and speeds up invoicing.
- Set Utilization Benchmarks: For teams, establish target billable percentages by role, such as 70 percent for designers. Benchmarks help you measure efficiency and set realistic goals.
- Audit Monthly: Review entries to catch time leaks, such as unlogged meetings or misclassified tasks. Regular audits ensure your data remains accurate and actionable.
Common Mistakes to Avoid When Using a Billable Hours Chart
Avoid these pitfalls to keep your billable hours chart accurate and enhance time management:
- Logging at Week’s End: Memory fades, leading to inaccurate entries. Weekly logging increases errors and risks missing billable hours.
- Mixing Task Types: Don’t combine billable and admin tasks in one entry, as it obscures profitability data. Separate entries ensure clear financial insights.
- Ignoring Rate Updates: Failing to adjust rates for long-term clients can undervalue your work. Regular rate reviews keep your pricing competitive and fair.
- Overcomplicating Design: Too many columns or metrics can overwhelm you and reduce consistency. Keep your chart simple to maintain daily use.
- Ignoring Non-Billable Patterns: High non-billable hours may signal process inefficiencies, like excessive admin work. Addressing these patterns can boost overall profitability.
Conclusion: From Time Log to Business Insight
A billable hours chart does more than track time. It unlocks insights into your business’s value. Consistent tracking leads to smarter pricing, better forecasting, and stronger client relationships. Whether you’re a freelancer or managing a team, pick one method, such as a spreadsheet or billable hours tracker, and start this week. With a clear system, you’ll turn every hour into an opportunity for growth, ensuring your time translates into maximum revenue.
Learn more
- Time Tracking Software Trends To Watch in 2025-2026
- Top Small Business Time Tracking Software: A Comprehensive Comparison 2025
- How Consultants Use Time Tracking Software to Balance Billable Hours

Making work simpler,
smarter, and more connected
Join our waitlist and be notified first.

Related Blog


Subscribe for Expert Tips
Unlock expert insights and stay ahead with TaskFord. Sign up now to receive valuable tips, strategies, and updates directly in your inbox.